Ok the translation isn't perfect, for example in German a "Waterbuffalo fan" becomes a "Waterbuffalo Ventilator". And Ray Meyers becomes renamed to "Strahl Meyers"...
Click here for Swedish page !
Ok the translation isn't perfect, for example in German a "Waterbuffalo fan" becomes a "Waterbuffalo Ventilator". And Ray Meyers becomes renamed to "Strahl Meyers"... |
||
| By Gunnar Forsgren, Värmdö, Sweden Click here for Swedish page ! |
Restoration Log (latest first) : (or click here for the Project Introduction)
|
May 13, 2005 I got a pair of side cover emblems from Brian Cutler in Australia. His company "BadgeReplicas" produce
a high quality repro of the GT750 side cover badge with flake finish GT lettering. April 27, 2005 Snow is gone and spring is here. Here is a movie showing a few scenes from the Classic Suzuki Club Scandinavia (CSCS) annual spring meet outside Stockholm. February 10, 2005 The bike is in its winter sleep, about three months until spring is here. Mileage is now 3990 kilometres. I haven't been updating these pages lately but here is a recollection of what happened since May 28, 2004 : I used it at the MCHK (Motor Cycle Historical Club) "Stocholm Rally", a great
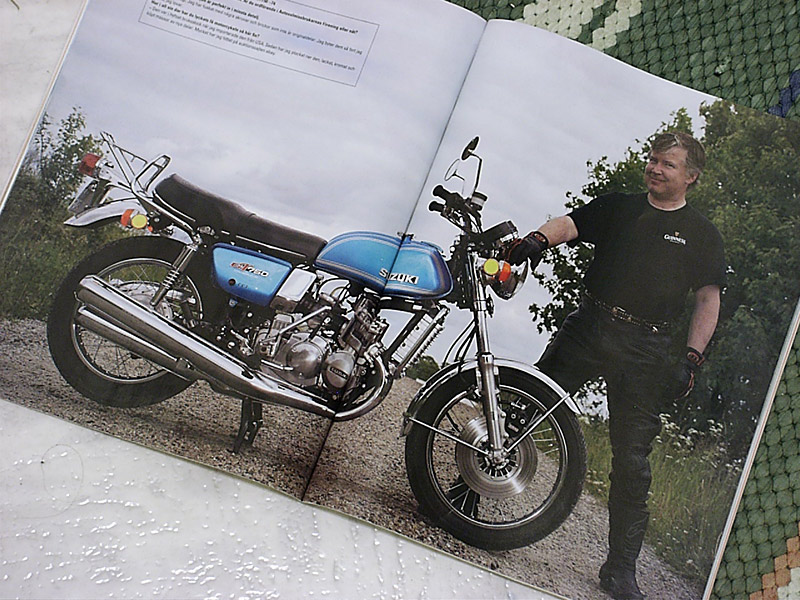
bike event that occur annually. The bike and its owner got illustrated over a full color 2-page fold in the Swedish magazine "Classic Bike" part of a spectacular photo session with several of the club's bikes over several pages. A moment of fame. Great honor.
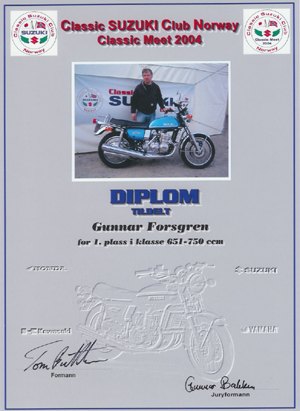
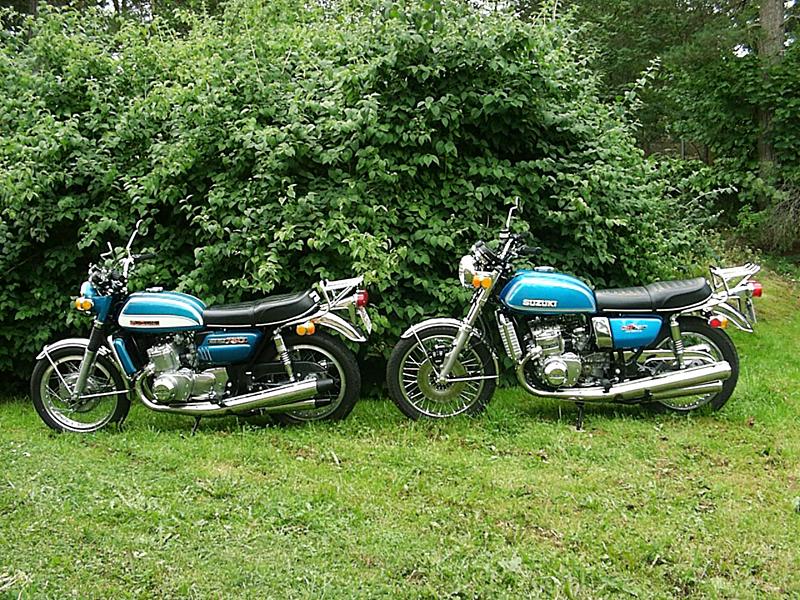
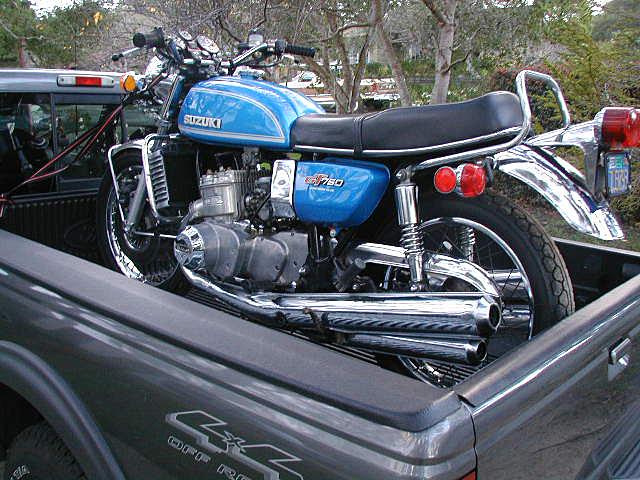
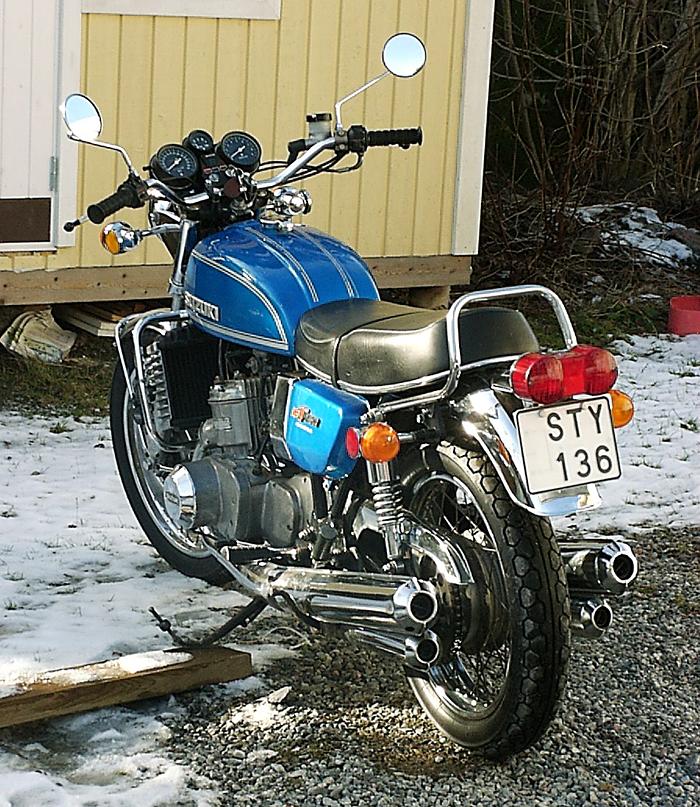
May 28-30, 2004 Me and Leif Österberg, another club colleague from outside Stockholm, travelled to the 2004 Norwegian "Classic Meet" in Bö, Telemark, Norway, arranged by Classic Suzuki Club Norway. It was a trip of around 850 miles total over the weekend. Due to the unusually cold weather it was a physical challenge to endure 120 mile motorway runs between tank stops but once on site we found lots of joy with our norwegian friends and the common bike interest. An ambitious arrangement where many classic Suzuki models and other Japanese classics visited. A more detailed page about our Classic Meet trip here ! The GT750L ran very well except for some minor service issues required along the way. The charger relay was adjusted too aggressively so the battery dumped acid and ran dry, the lower beam hedlamp burnt out, chain tensioning/lubrication was needed once. The gear indicator logic seems to have gotten messed up by overvoltage so the LED show "9" rather than "5".A tank stop was needed each 120 miles or so. But it's amazing that a 30 year old model can manage continous highway speeds for hours with such reliability. Luckily I had changed the front sprocket to 16 teeth the night before otherwise I would never have kept up with Leif's GS1100 which has better 'overtaking authority' on the highway. The GT750L won a prestigious award on May 29 by winning the "Suzuki 651-750cc" category at the concour ! This is a very honourful result given the refinement level of many of the norwegian bikes in this category. I rate this as a personal achievement due to the long distance travel on the bike the day before. So now I'm the owner of a Champion with all the troubles that follow (I'll be driven to maintain/refine the level even further....) although this bike was originally not intended to end up in this category but was going to be a sun-bleached every-day bike to use in any weather.
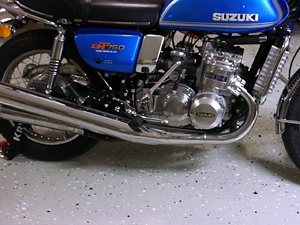
Time for the Classic Suzuki spring meet in perfect sunny weather on winding roads south of Stockholm. The exhaust system was a bit louder than the one I replaced but probably they are when new. Another GT750J owner had problems with a dead battery so he got lost along the way and we had to turn back to find him. Lots of fun anyway and finally everybody was back home after some 120 miles in one day. It was a perfect event for getting some engine run-in, I've now passed 100 kilometres and the engine feels better all the time. April 16, 2004 It was really time now to get the GT750L ready for the Classic Suzuki spring meet on Saturday April 17. I worked until 2am in the morning with installing the NOS exhaust system. One O ring for the intermediate exhaust pipe tubes were missing and I finally had to take the GT750J exhaust apart to borrow an O ring from it. But I got ready for Saturday. March 17, 2004 The parts from GTReiner arrived :
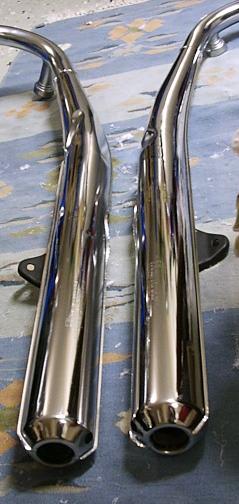
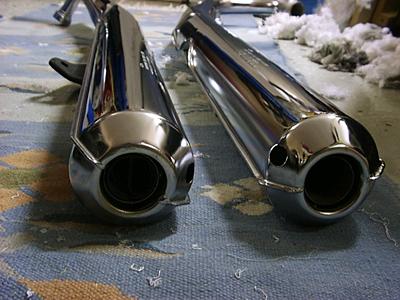
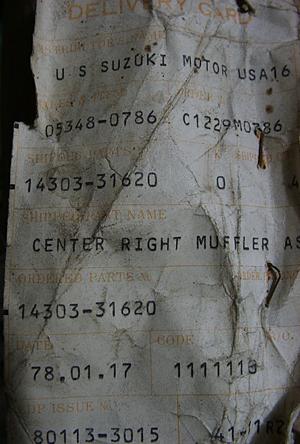
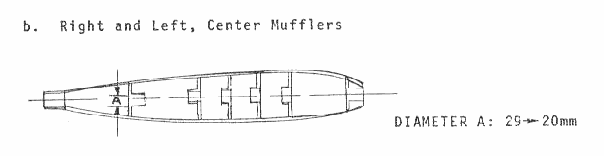
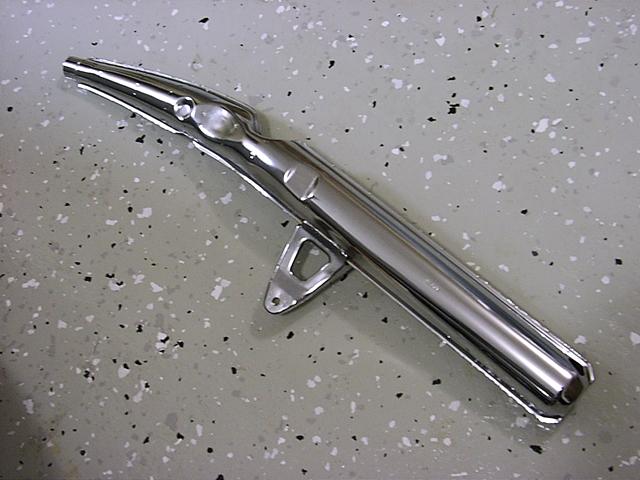
March 12, 2004 No work has been done so far during the winter with this bike. I decided to go for a left hand inner NOS muffler that good ol' GTReiner is going to ship me. So I now have a complete unused exhaust system to install, with all new baffles. When that is done there isn't more to do with this bike than to enjoy "consuming the condition". Just about a month left now until the first bikes begin to appear on snow free roads... GTReiner prices in Euros October 24. 2003 Final milage reached since the rebuild was 762 kilometres. The bike is now off the road for the winter season. 2 degrees Celcius is a bit chilling. At last I got hold of the pair of NOS outer mufflers from Vintage Parts that was lost for quite some time during shipping. Quite nice condition, no dents which is the most critical thing, Some minor traces of 25 years of storage but nothing disturbing. They will look very nice once installed. It's hard to find a set of NOS 1974 mufflers, they are unique to that year (intermediate front pipes).
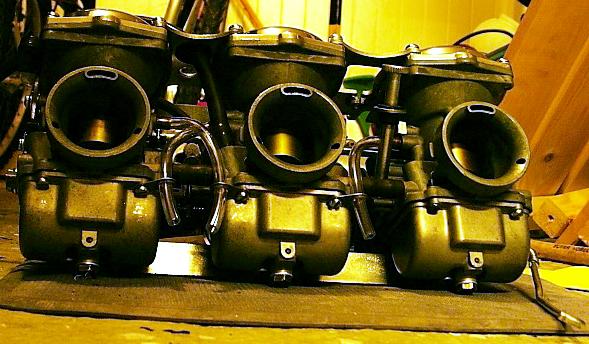
September 12 I had carburetores out to fix a fuel leak. I reinstalled the original Mikuni needles and
set the clip one notch higher than the middle slot.
Anyway I did quite a lot of racing around the neighborhood roads one sunny Sunday this month, mileage was around 700 kms what I started off, and the engine now feels more at home above 6000 rmp. It's easy to explore beyond the run-in-instructions with this tempting package. Such as with wild Mustangs these bikes need a good riding in before they can be used fully :-)
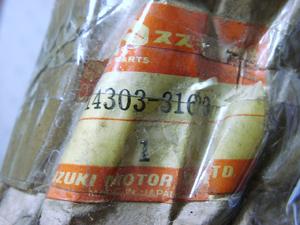
I reached 170 miles now. And the bike seems to continue to work. The last expensive subproject has been to find a pair of NOS outer mufflers. I have bought a set (unseen so far) currently being shipped from Vintage Parts in Ohio with sea freight from Houston to Gothenburg, Sweden. Yesterday I got hold of a RH inner muffler that I bought on Ebay earlier this year. So now
only the inner left hand is missing to get a complete replacement. But no hurry, sooner or later one will show
up. Back in May I directed it from the seller to Ray Meyers in California who was kind to hold it until I visited
him in June. But the package was too bulky and the muffler looked to much like a terrorist weapon so I left it.
Now Ray sent it to me.
August 15 Approved and road ready
The bike passed the swedish government import registration and traffic inspection today
without remarks. So the bike is now a legal swedish street bike. It was much less buearacratic than I had
expected. Swedish rules for "import for own use" still voids many stepping stones that otherwise is a
challenge for the importer. I didn't need to present much more than the original title. They weighed it and measured
the wheel base and took notes of the tire dimensions. In total a bike originally bought for US $1000 will have
cost a total of US $2400 including purchase price when it has become a legal swedish vehicle
Restoration completed ! After some usual incidents (couldn't find the chain link for the O-ring drive chain I was
going to use so I installed the old worn out chain so I could get going, two harness connectors were at the wrong
locations in the electrics central so I had connected the ignition coils to the alternator, hence no spark when
I tried to set the timing, some usual water hose leaks when I finally got it right and started it up, that is;
usual stuff that is no worse than any other day. But the fun thing was the engine started right up and still all
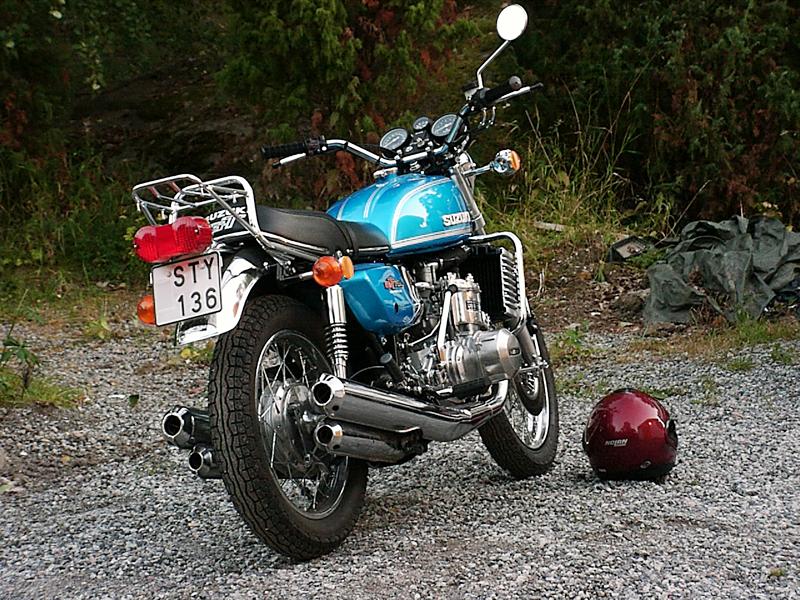
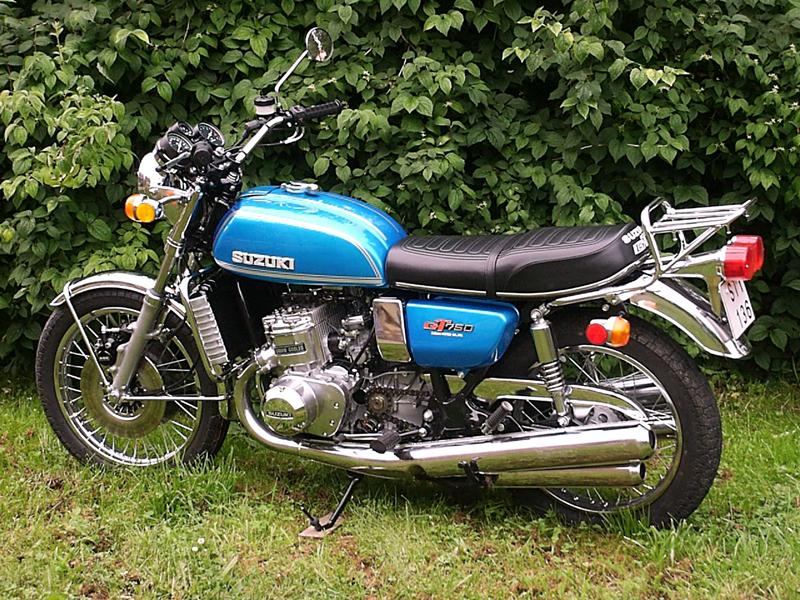
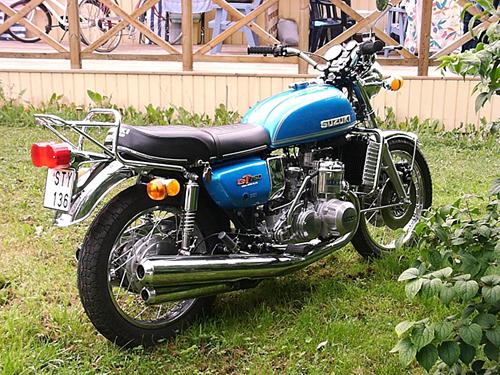
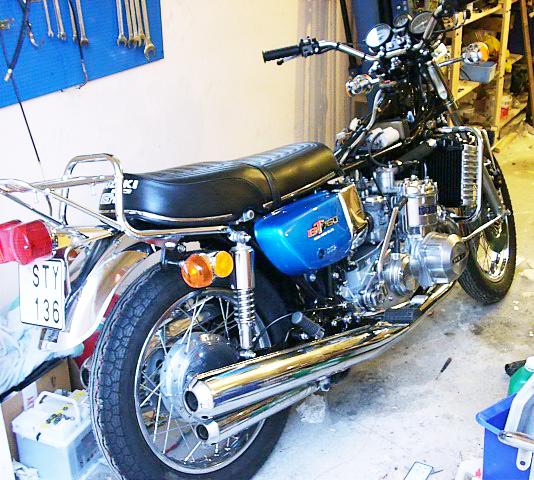
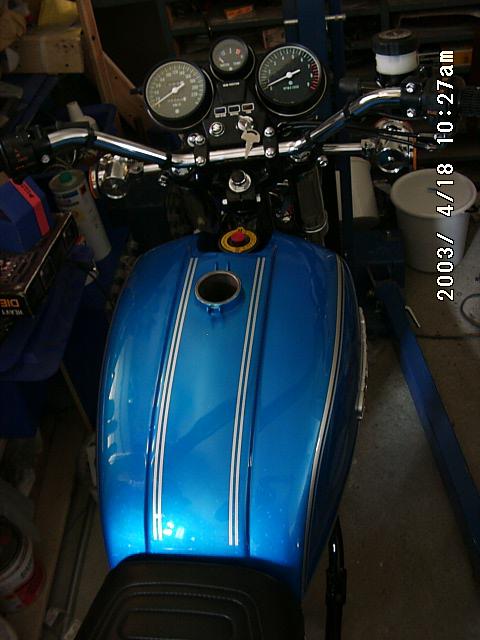
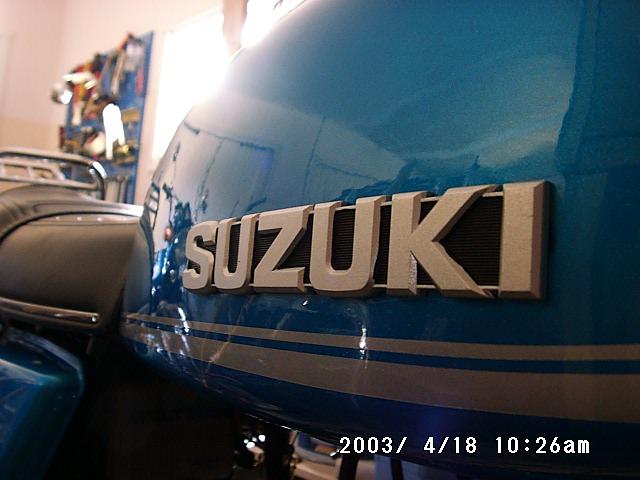
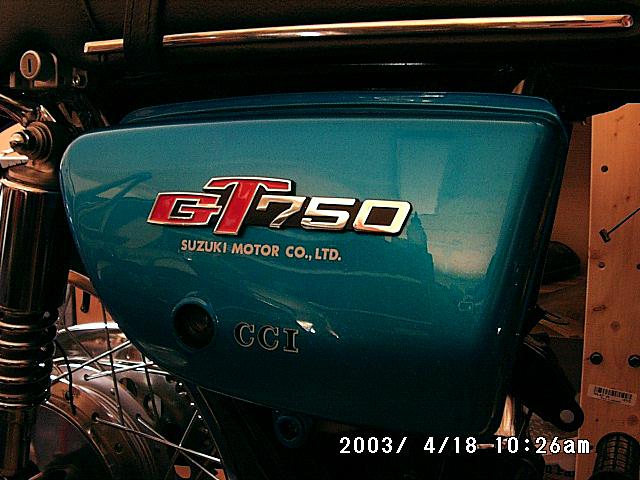
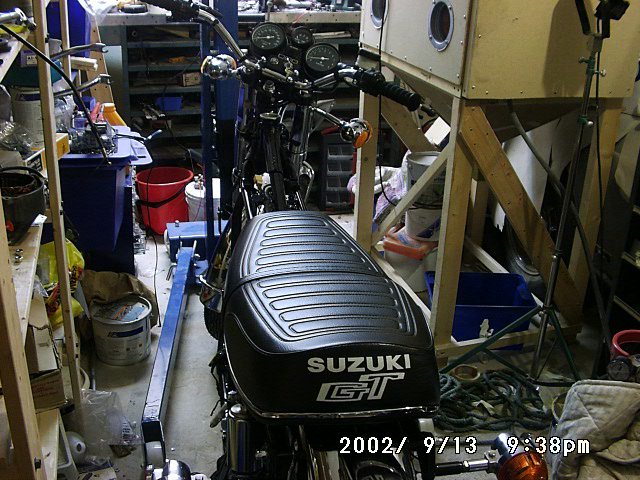
seems well. I think the radiator keeps tight as well after I added some radiator sealer.. Enough ! Here is the restored bike photo collection. The good ol Casio digital camera has a problem with the blue flake but I got a few nice photos. The chain covers are missing in the photos but you get the idea. You can click on most images to view a larger version. Enjoy ! /gunnar
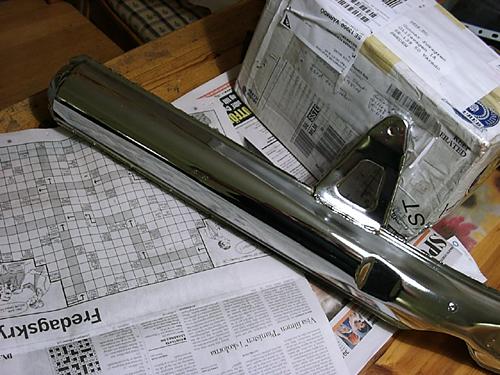
July 28 Almost there now ! I've done a lot of work and not many photos got taken.. Tomorrow the 29th I'm going to start the motor up for
the first time so it will be a big day in this project. More photos of the finished bike by then. I reinstalled the old mufflers, they look unbelievably good in the below photo.
CV Carburetor Rebuild, see this page !July 22, 2003 Assembling continues..
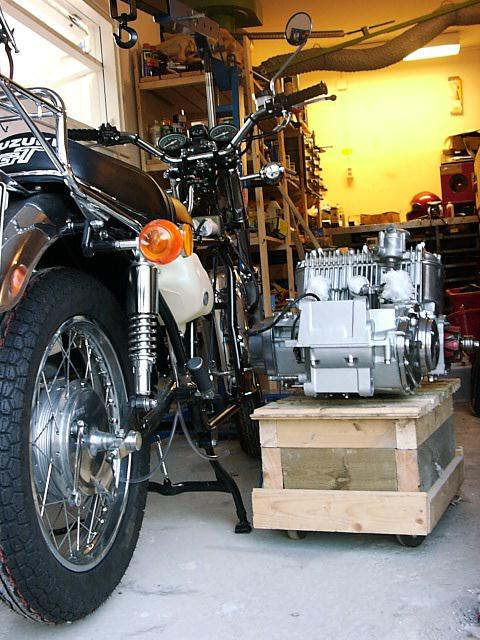
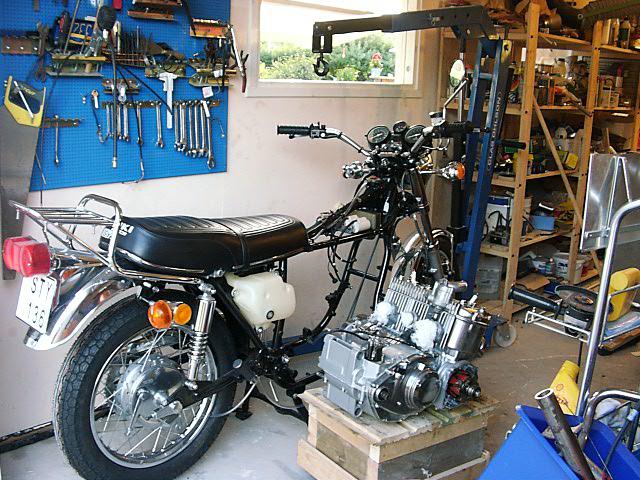
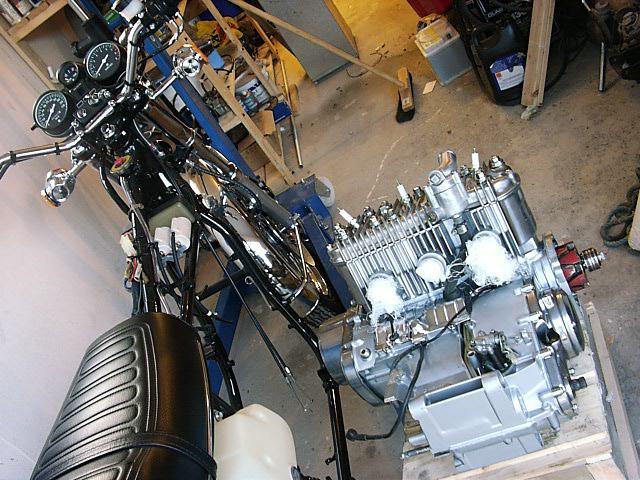
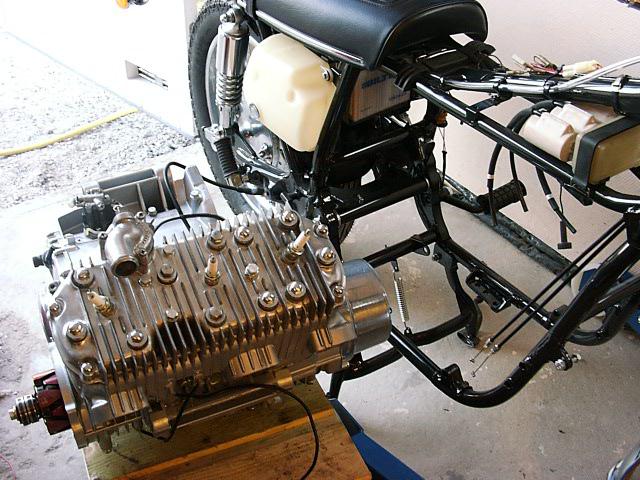
July 21, 2003 Engine into frame..It was time to get the engine into the frame. The engine hoist is a good helper here. I have made a wooden box on wheels on which I place the engine and attach ropes to it from the frame and with the help of a daughter who operate the hoist I pulled/lifted the engine in place, went without too much drama but she got bored and left for TV before I was done. |
|
May 31 2003 Electrical ProgressI have the electrical system under control now after identifying the final loose ends..,
I installed a NOS "#2 wiring loom" all without blowing fuses or causing smoke emissions ! That's probably
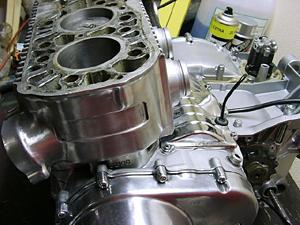
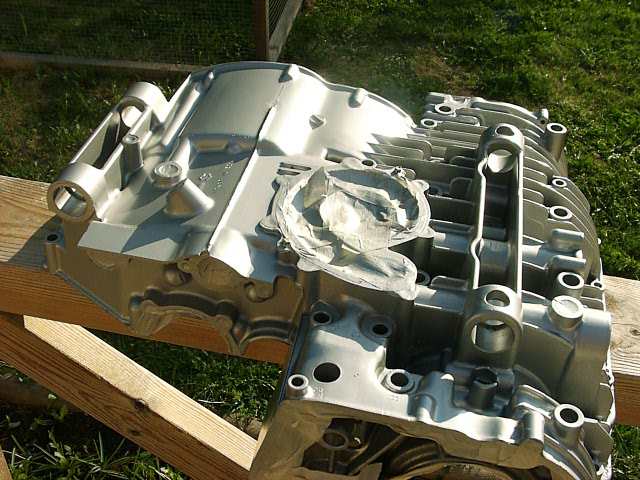
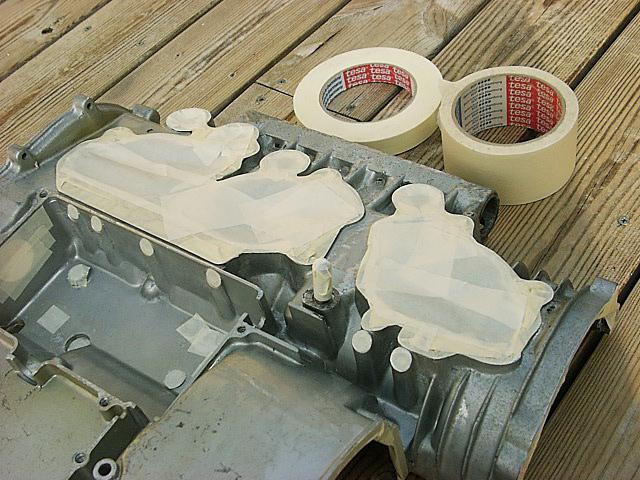
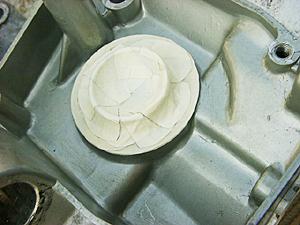
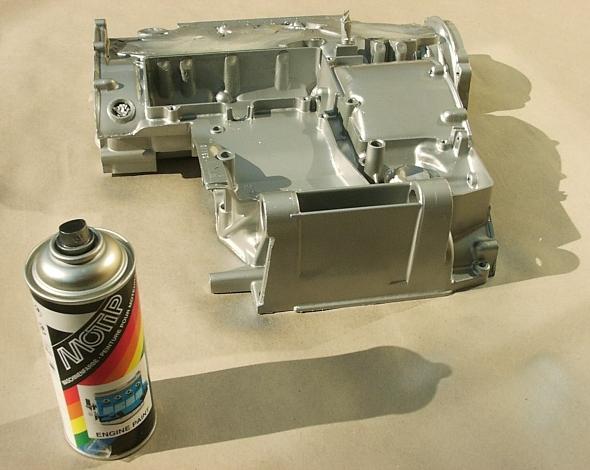
a project milestone. May 25, 2003, 0.28 am Engine Case RestorationRefinishing of engine cases requires patience and time
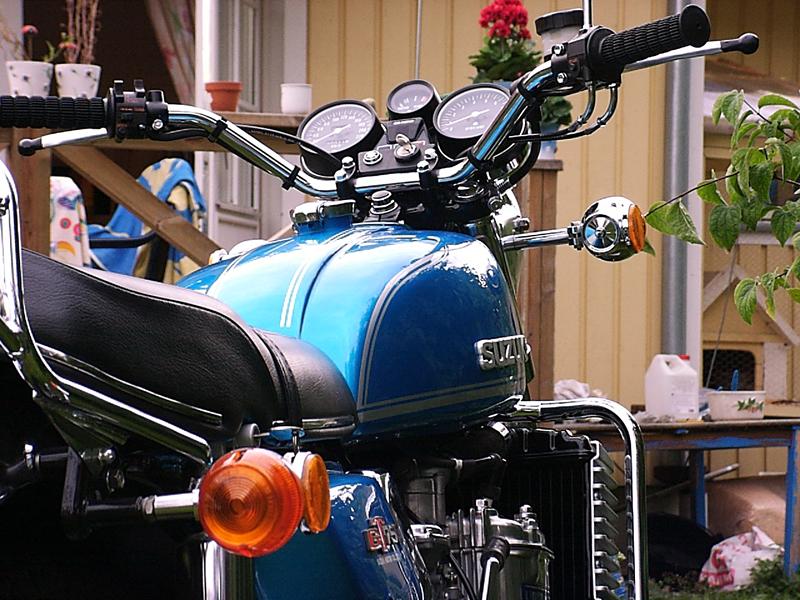
The PaintjobPainted fuel tank and side covers arrived after six months !
See this page |
Cylinder ReboreI had the cylinder block rebored by EBOS in Malmö, Sweden, |
Polished the sprocket engine covers, result is better than expected using wet sand paper 240,400,1200 + steel wool,
an old power drill with buffing wheel and some unidentified blue polishing paste.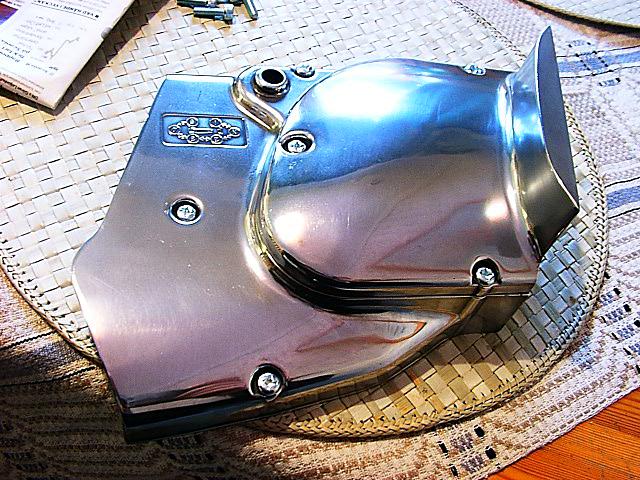 |
I imported this bike to Sweden in January 2002 from Ray Meyers in Monterey, California, another GT750 enthusiast.
When restoring a motorcycle like this it is easy to get in contact with other people interested in the same model.
In conjunction with a work trip to California the recent years I have been able to visit Ray and also got aquainted
with his bikes. He had used this bike as his everyday runner while he was working on restoring another GT750L that
he once bought new in 1974. After several years of work Ray was finally finished with his amazing restoration and
didn't need this 'duplicate bike'. I had the opportunity to try it on the road at two occasions, 2000
and 2001 so I knew it was good.
Here some photos from 2002 as well..
Here's a photo from Ray in Monterey when he had loaded it onto the truck for transport to the shipping
harbour.
The below photo show the bike after arrival as it appeared before I began the restoration. In this photo it's equipped with swedish registration plates and thus has its new vehicle identity. (This doesn't suggest there's much work to do but if you look closely on the photos further down this page you may find why I couldn't resist working on it).
I've already restored a GT750J (1972 model) which is described here in unusual level of detail.
I hadn't intended to restore the L to this level of detail but I came across a lot of new parts that commanded a more ambitious project.
GT750L ad in 1974 magazine
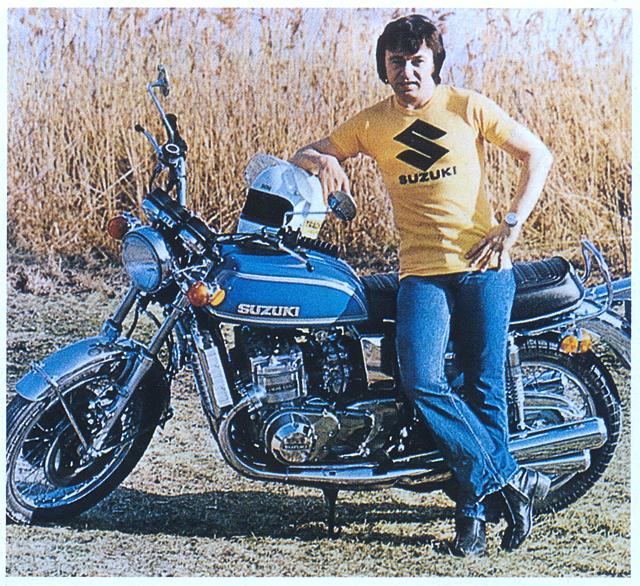
I use the below photo of Jerry Williams as a reference (Jerry is a swedish rock star legend since the early 60's who's still active on stage). Jerry was a waterbuffalo fan in the 70's, here with a new GT750L in a 1974 photo. The bike will look exactly like this when finished.
I've had the bike down to the naked frame, sandblasted and repainted it in 2-component gloss black auto paint.
I've been restoring those parts myself that are suitable for sandblasting/repainting and will install quite a lot
of NOS parts.
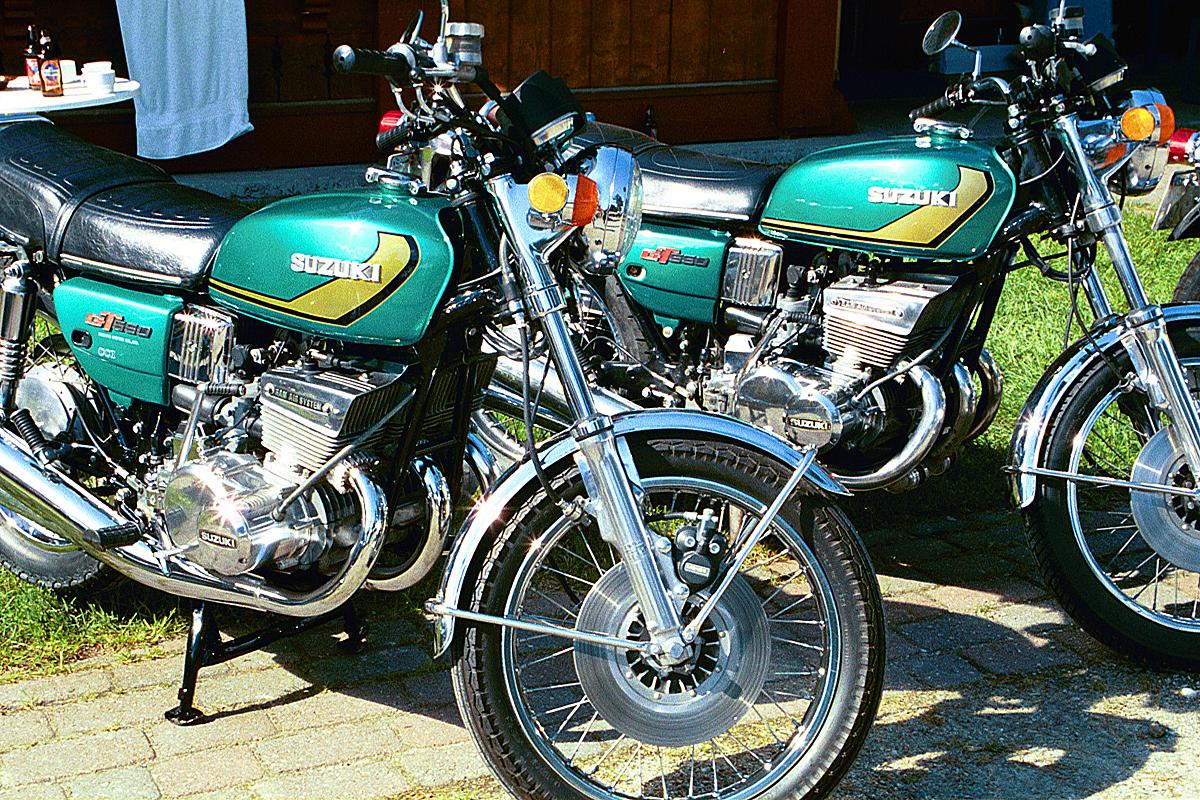
The tank and side cover paint job was done by a norwegian company Custom Color who have a good track record of motorcycle paintjobs on bikes of the norwegian Suzuki club section.
Here a photo of two norwegian GT550's both painted by Custom Color, click for higher resolution version.
Below I illustrate various phases of the project.
Each chapter will grow over time. There are already too many large photos for modem users so I need to reduce the download size when I find the time.
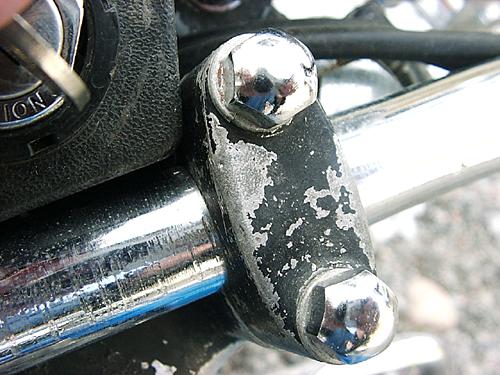
What looks good in an overall photo can appear as quite worn out in closeups. This unusual gallery of defects show the initial ugly spots of the bike, all which suggest why a restoration was a tempting possibility :
|
Before Restoration |
What was done | |||
|
|
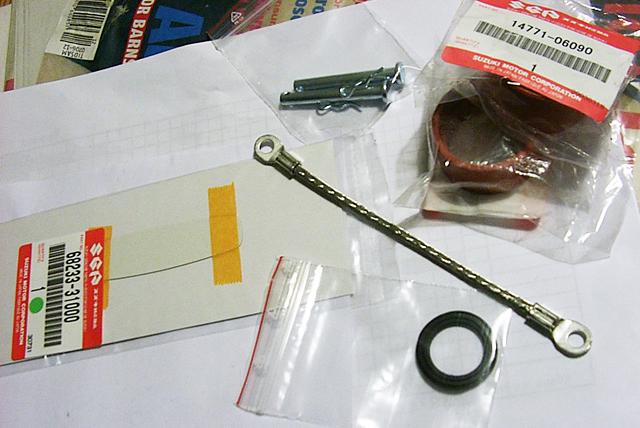
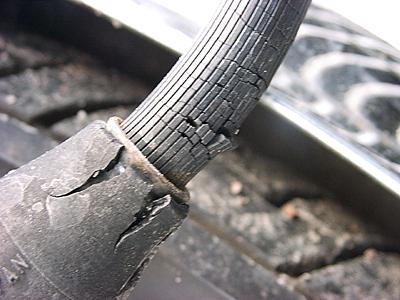
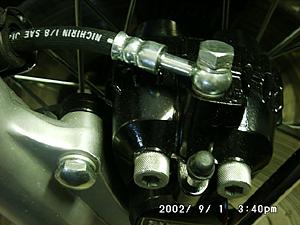
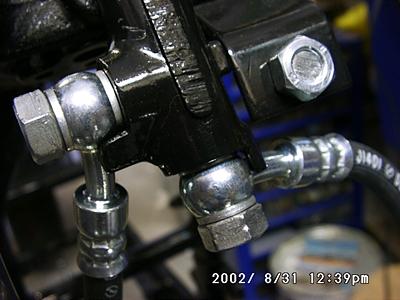
I replaced all break hoses with new parts. They were really dried up and needed replacing. I got the hoses from
Vintage Parts in Ohio : #1, the top one that goes from the master cylinder  #2, these two hoses go to each side of the fork  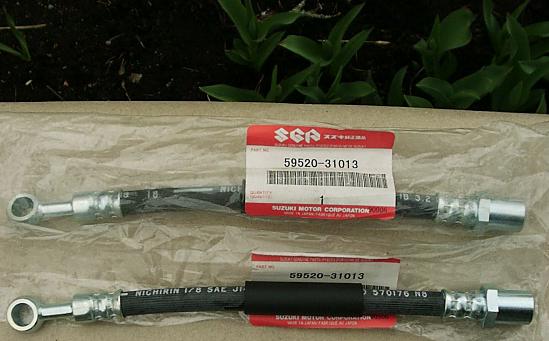 The #3 brake hoses connect to the brake calipers. Reiner Schneider in Germany could supply the two rubber covers. |
|||
|
|
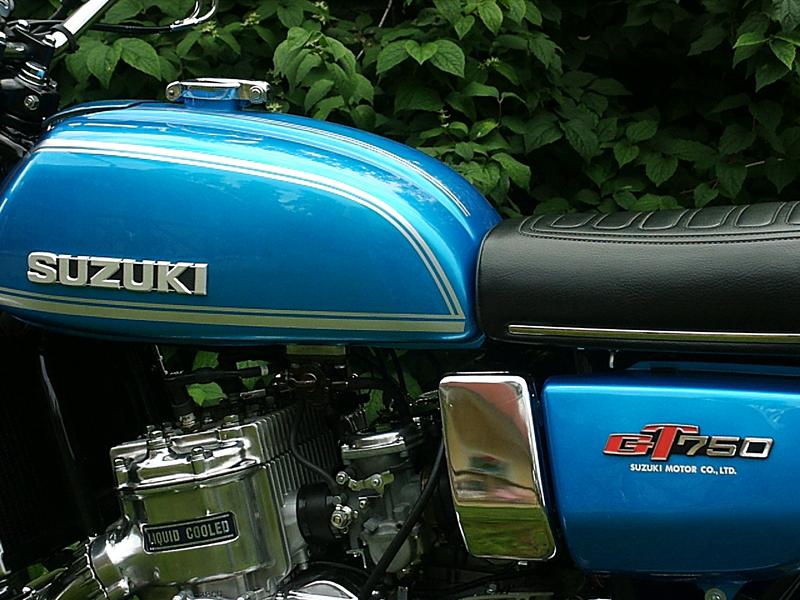
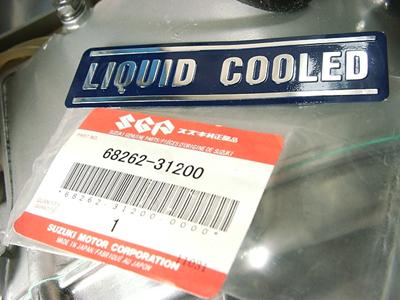
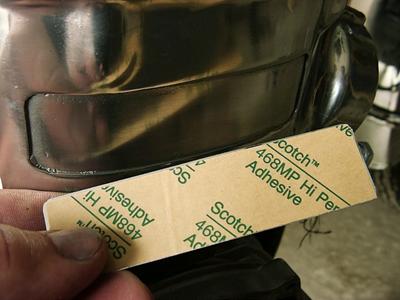
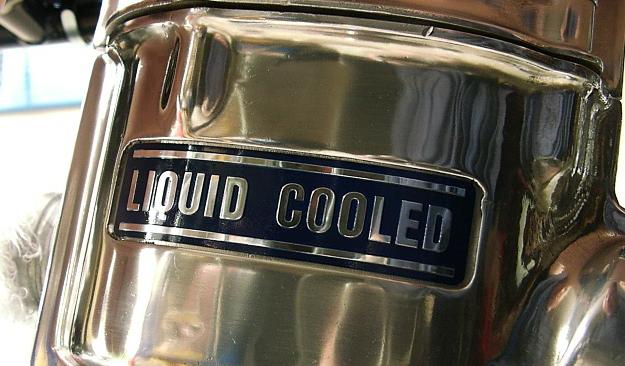
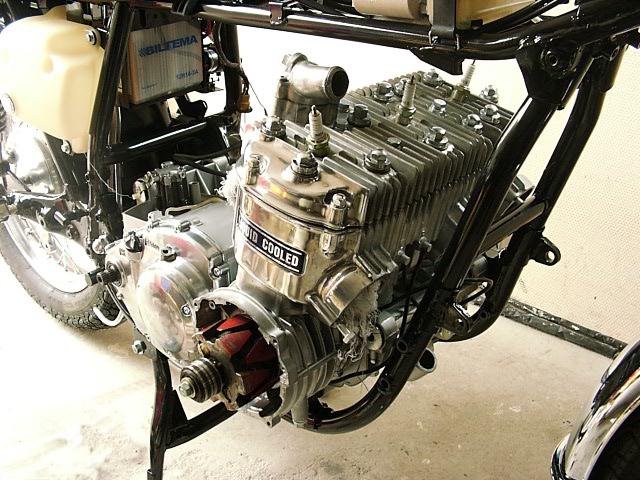
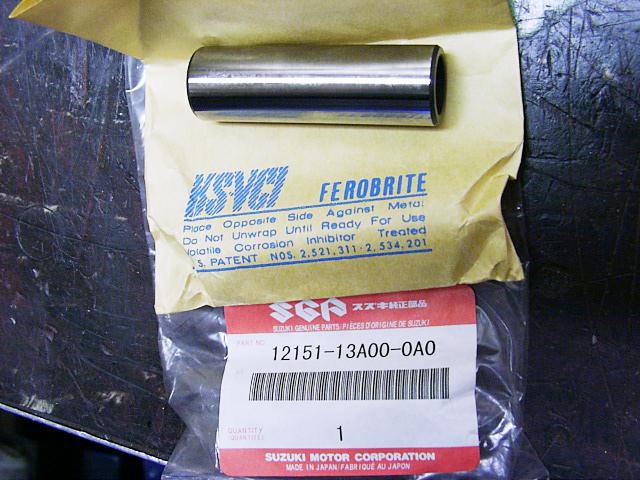
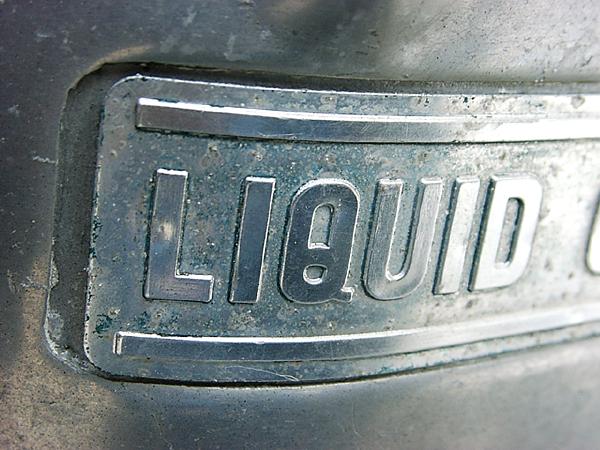
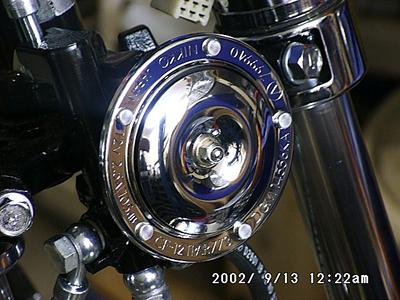
I got new liquid cooled emblems from Paul Miller i USA, $25 !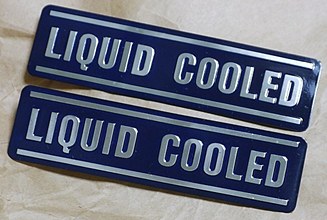 These emblems are pretty essential for a detail restoration of this model. I will have to polish the sides of cylinder block to make the badges justice. |
|||
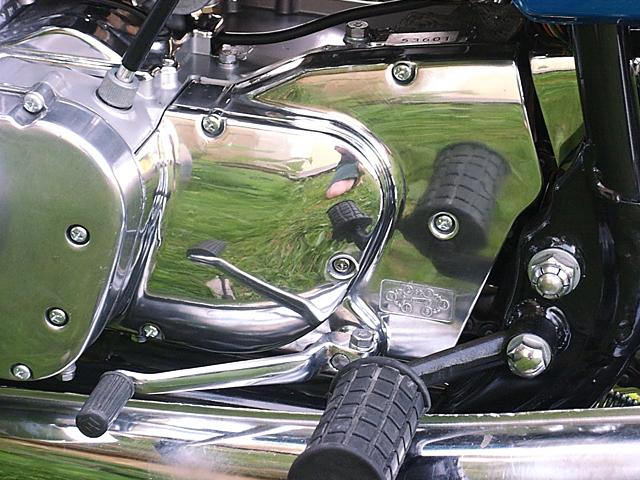
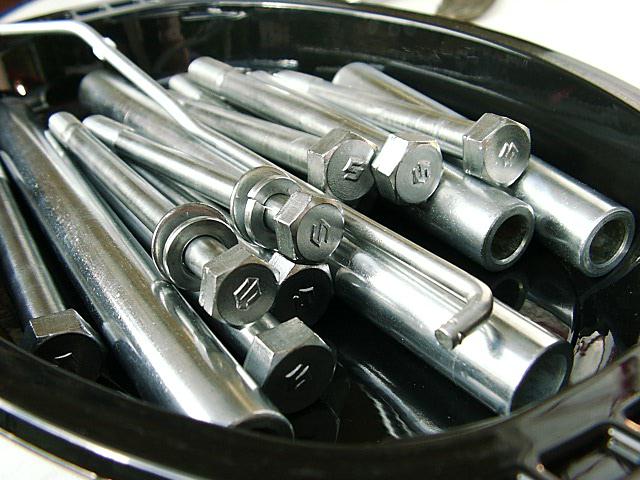
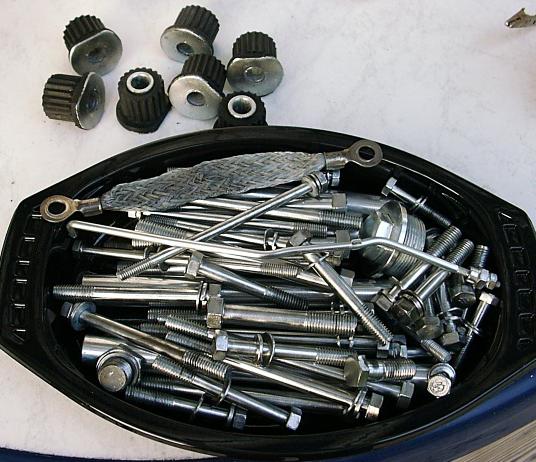
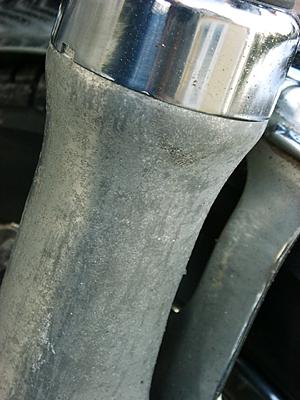
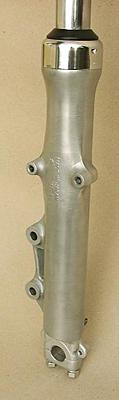
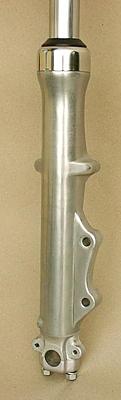
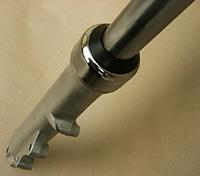
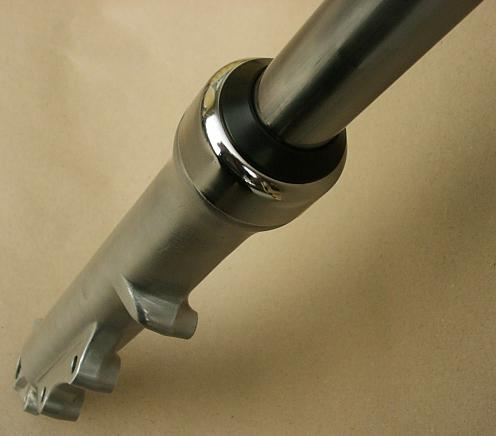
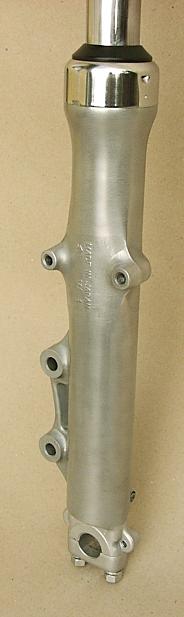
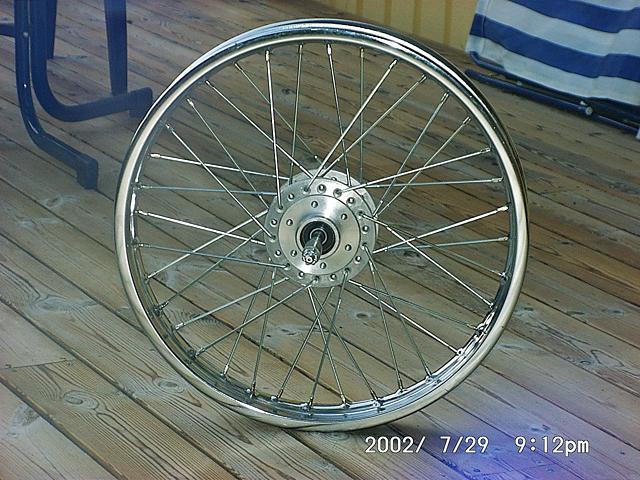
Fork legsI've polished fork legs and replaced the chromed dust cover rings. I've gon through the entire front end, calipers, discs, chrome parts. I've rebuilt the wheel with a NOS spoke set, new tire. I have zinz plated some special screws. Many new bolts are standard metric sizes that I can buy by weight from a local construction warehouse. |
||||
|
Före: Oxidized fork legs |
|
|||
|
|
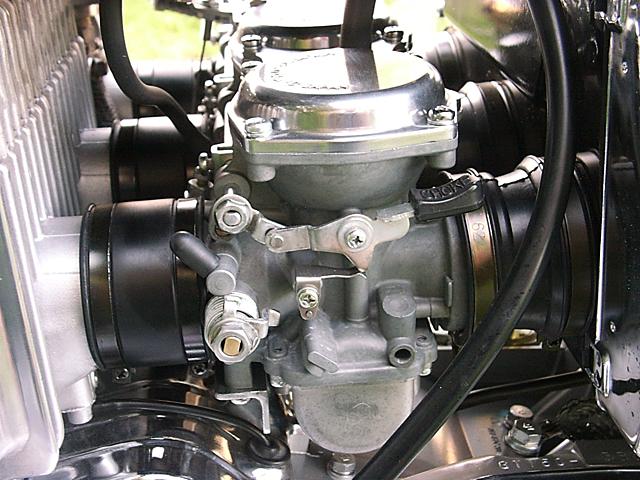
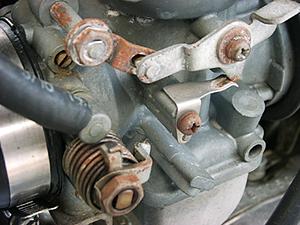
I finally began working on the carbs, Some days are needed when you don't have anything supposedly more important that other people tell you needs to be done. It took me two days of vacation ! | |||
|
|
I used the ones that I replaced on the J model, these are good enough for this bike. I used new lock washers and a set of rubber seal equipped washers I got from Paul Miller, pictured near the end of this page | |||
|
|
See above | |||
|
|
Reiner Schneider i Tyskland supplied a beautiful new Nikko horn that is very close in appearance to the original Nippon Denso horn. | |||
|
|
I was able to get a rechromed bumper from Vintage Parts in Ohio, USA. The finish is better than a new original so I am very pleased with this part. | |||
|
|
This can be sandblasted, I sent the tank to Custom Color in Norway who is doing the entire side cover/tank repaint
work. They wanted the stripes and paint to remain as-is when I sent it so they could see the exact locations of
stripes and the color type. They paint the actual stripes instead of working with striping kits. Here is how it turned out |
|||
|
|
I found a good cover on Ebay that I could polish to good finish. | |||
|
Detail of tank defects |
As mentioned above, Custom Color resurrected the tank | |||
Road contact on master cylinder ! Probably the entire plastic container flew off here. |
I've repainted the metal parts in satin black | |||
|
|
 I have new cables, I've restored the control switch housings, new screws. This was fun work and very rewarding. 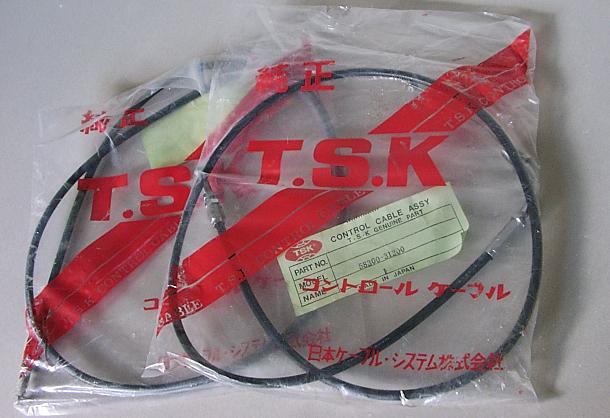 |
|||
More detail rust photos:
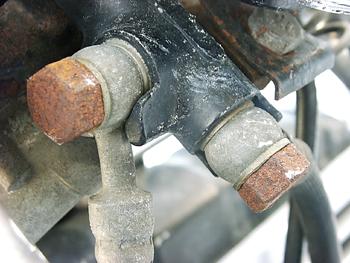
Brake hose central connections.
This is the result after restoration (sand blasted/repainted black parts, new brake hoses, zinc plated bolts, new
washers).
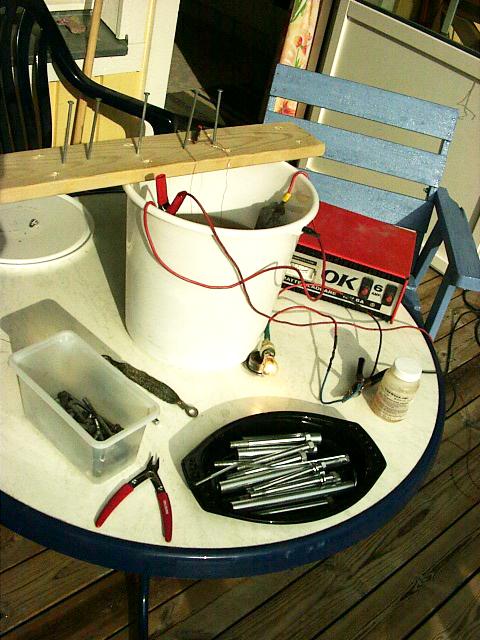
Click here for a description of how you can zinc plate those special bolts yourself !
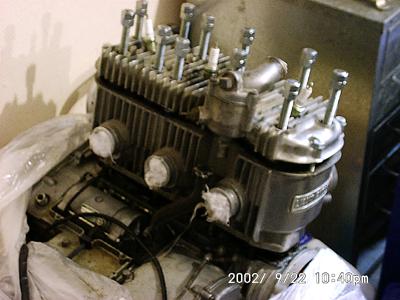
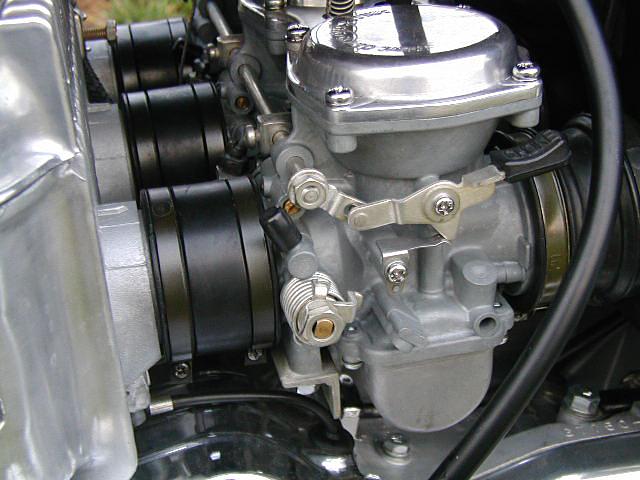
My carburetor rebuild page is here
I used the below photo as a reference, it shows carburetors restored by Ray Meyers on his other GT750L bike.
This is the ultimate reference.
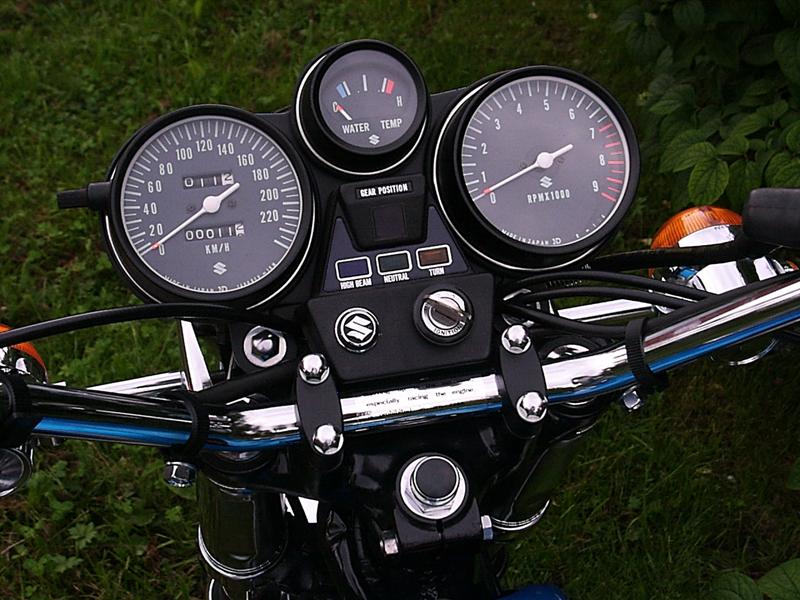
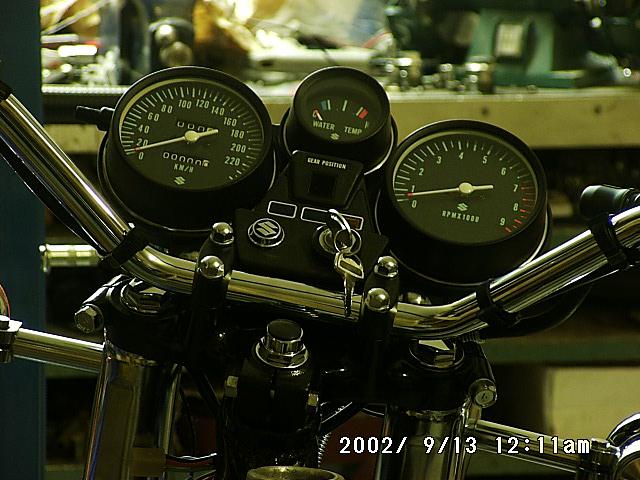
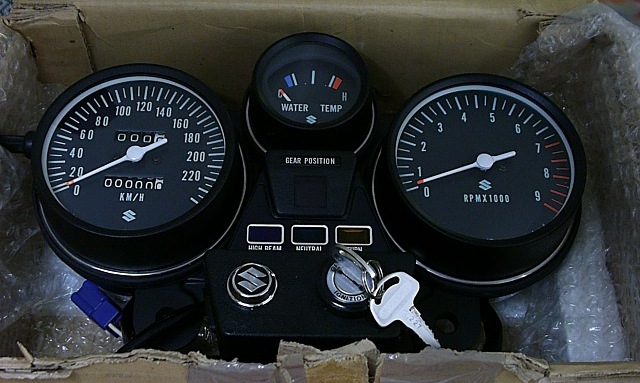
It's difficult to find gauges that are in a good enough condition for a cosmethically restored bike.
I was able to find a KM/H calibrated speedometer on the german Ebay that was good internally.
I also found a NOS MPH gauge. I took both speedometers apart and used the housing of the NOS one with the KM/H
internals and thus got a NOS condition KM/H gauge (which is normally impossible to locate).
One day I talked to Paul Miller on the phone about something else and he offered me a NOS complete instrument assembly where the speedometer was missing. $250 and I went for it. Getting hold of it influenced the ambition level for the rest of the restoration.

Dented points cover, not much to waste time on. NOS ones are $75 but makes a difference.
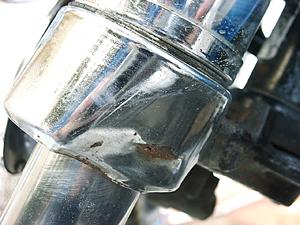
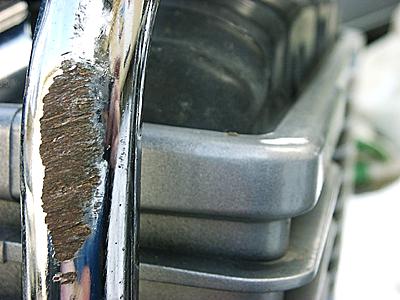
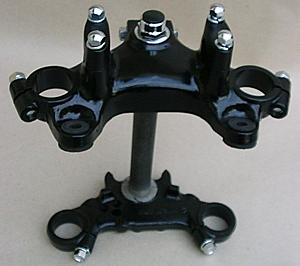
Heavily dented chrome trim around the forks, from ropes used during transport.
I have found a pair of NOS covers to replace these.
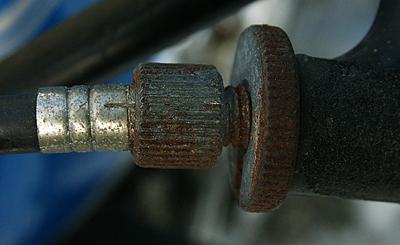
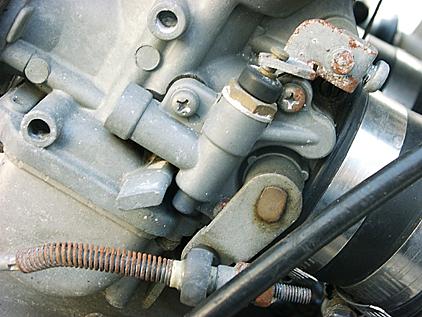
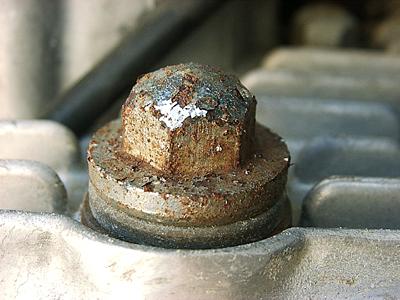
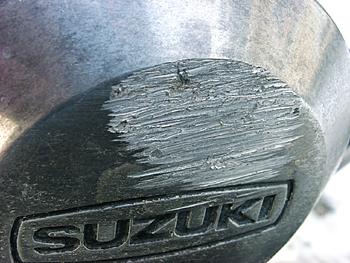
Detail of clutch adjust screw. I think this bike has lived some of its life outdoors in a damp climate.
Worn paint on steering parts. Wear marks on handlebars from rattling keys...

I sandblasted and repainted all black surfaces. I have new nuts bolts where it makes a visual difference.
Photo after restoration (the digital camera had lost its focusing ability here)
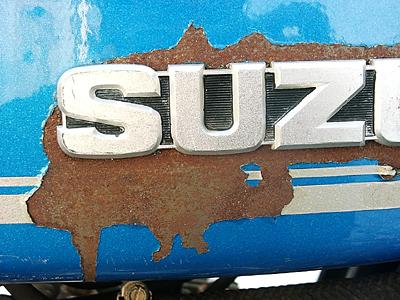
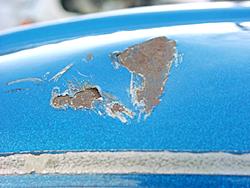
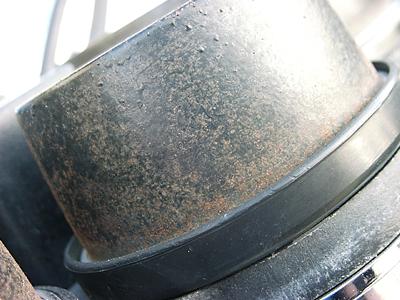
Some examples of rusty sections on the bike that invited me to improve on the situation.
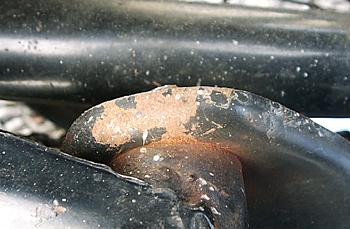
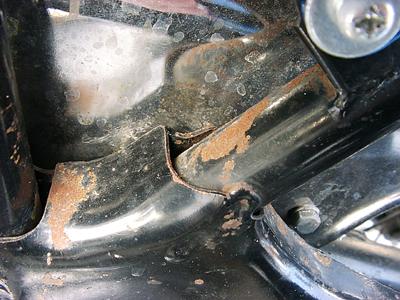
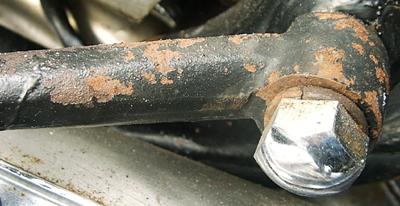
A tempting sight for a restorer
Click here to see the collection of NOS parts for the restoration
A large portion of the restoration cost in this project is the NOS parts. Also a lot of work went into looking these up at various foreign suppliers. In this case the total project cost is at least twice that of the resulting market value of the bike. But for me it makes sense because I enjoy the condition a lot and it wouldn't be possible to find such a ready-made bike for sale.
A lot of parts can be restored to very good finish by sandblasting and repainting. Some special screws/bolts where it is expensive to buy new parts can be zinc plated/polished so they look like new parts.
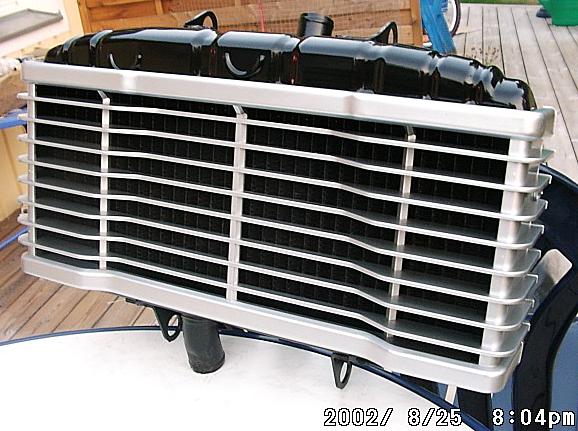
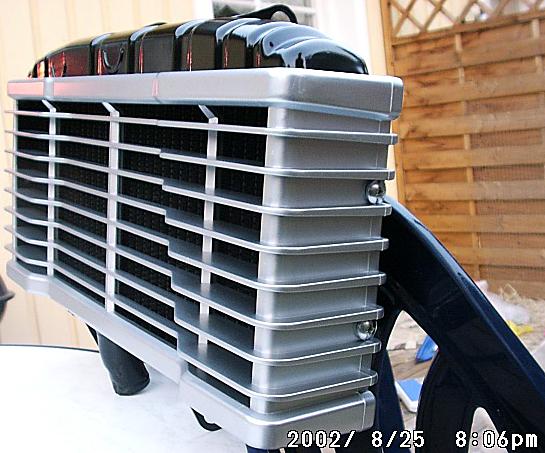
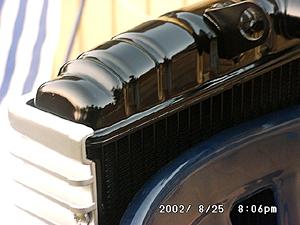
Radiator
Sand blasted, repainted satin black, radiator cover repainted silver metallic.
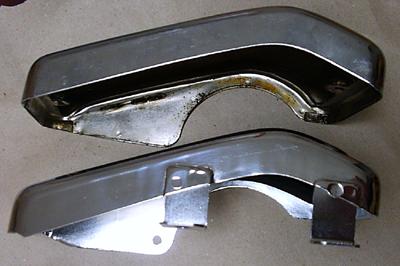
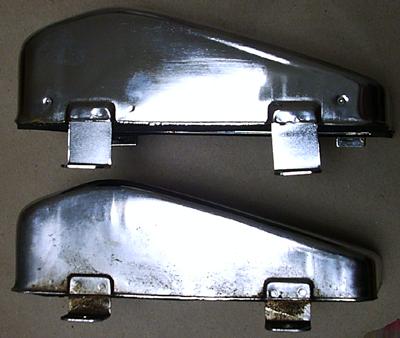
The L model Air box adventure
I was able to find a pair of NOS air box chrome covers. But it turned out the L model (1974) air box is special for that year. Spare chrome covers were never made available for that year. Later air box models have slightly different covers that will not fit the L model box.
The following photos show the differences:
The new covers didn't fit the L model box so I got a M/A model box from Reiner Schneider in Germany for 20 Euros.. It was good enough to be sand blasted, this shows half the box blasted :
For the engine's survival it's important to get ALL the sand particles out of the box after this job.
I'd actually advice against trying this if you aren't a self-certified Sand Particle Fighter of the highest ranking.
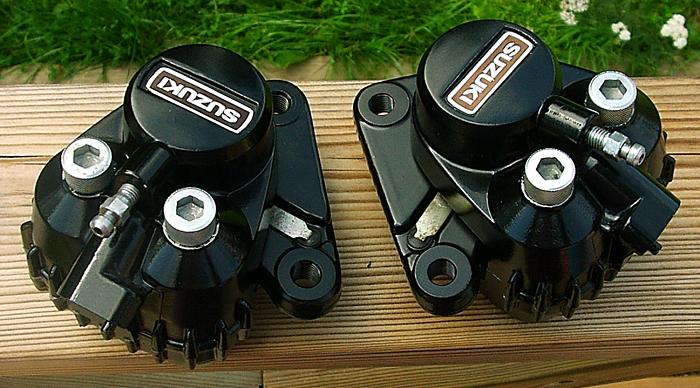
Brake Calipers
I sand blasted and repainted the brake calipers. I zinc plated the bolts and bleeding screws.
Here is a photo with the calipers installed :
Fork legs
Polished/clear coated fork legs
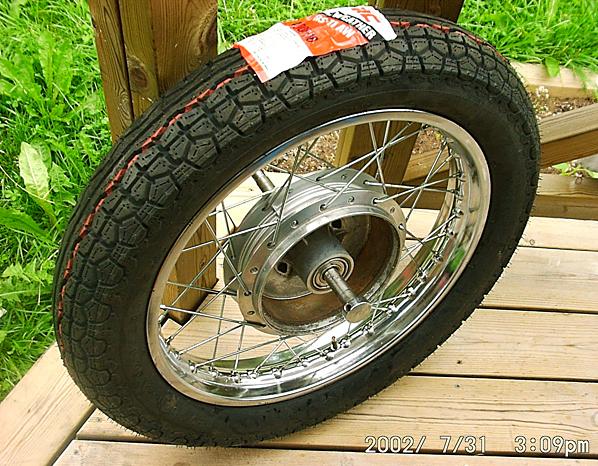
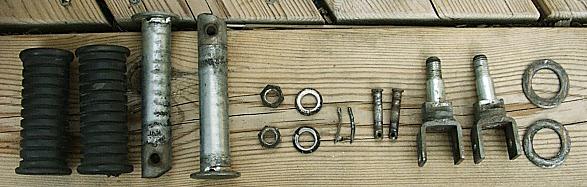
Wheel building (rim lacing)
I rebuilt both wheels with new spoke sets. This was easier than what I expected but I cannot exactly describe how I did it....
I use a set of IRC (Inoue Rubber Co.) tires that I originally got for the GT750J restoration.
As a freshly manufactured tire almost 30 years later these look very close to the tires that came on these bikes when sold new. I got them here (IRC GS-11).
Front and rear
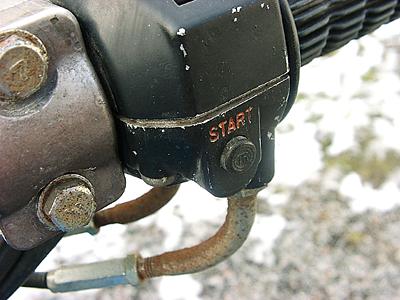
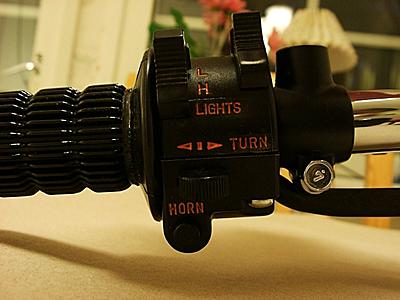
Restored switch controls
It's very rewarding to try to restore the controls cosmethically rather
than compete on Ebay over new ones. Getting the orange lettering to look good is a bit difficult.
I filled the recesses with paint and wiped off with my thumb.
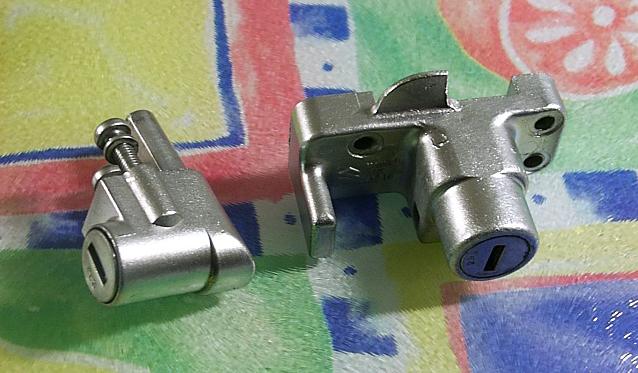
It's a messy job with lots of opportunity for failure.Zinc plated lock parts
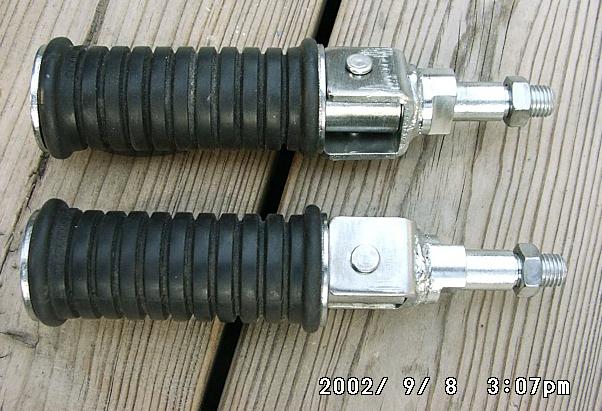
Rear footpegs
These are the perfect object for a zinc plating job !
The Caswell plating kit did a good job here
Before
After !
Jag used a 12V 100W headlamp bulb in series with a12V battery charger to get some action in the plating electrolyte. I plated all these part simultaneously, 9 Amperes for 10 minutes... I later polished each detail with a rotating steel brush. Excellent result.Painting of frame parts
Swing arm and centre stand
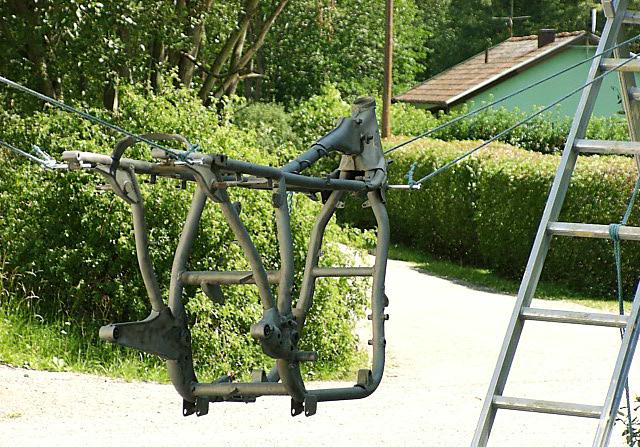
Sand blasted and cleaned frame hanging between ladder and a corner of the house, ready for painting.
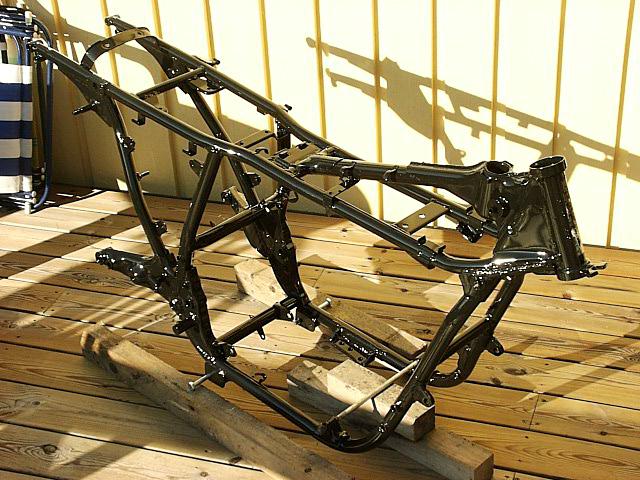
Paint hardening, I used a 2-component gloss black auto paint. It's expensive but very good durability.
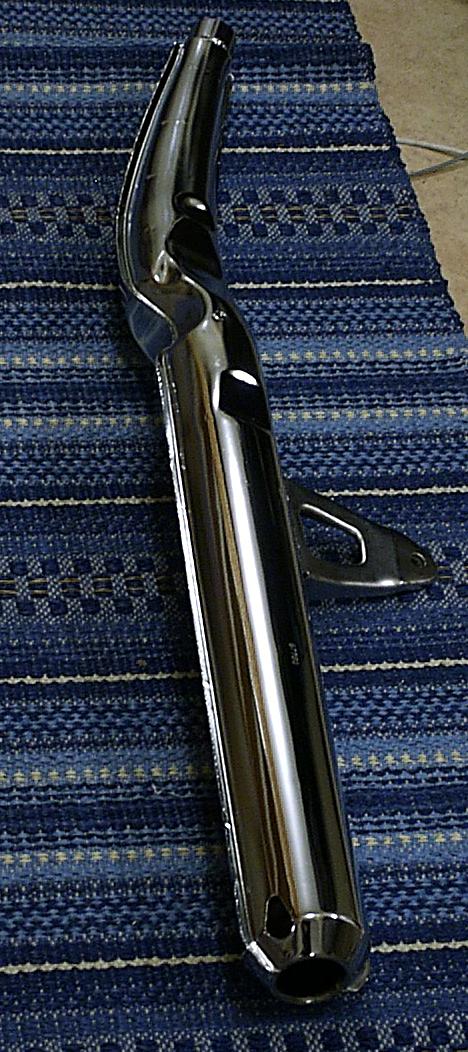
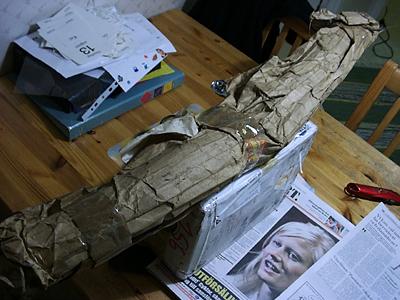
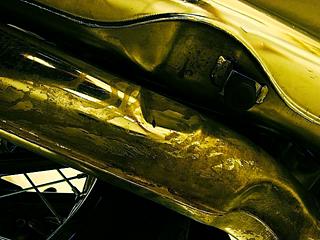
I was able to clean up the mufflers so they look decent, especially in photos !
I found a NOS center pipe to replace the old one that had a lot of rust on the intermediate pipes.
I currently (2003-08-15) have a set of NOS outer mufflers being shipped to me sea freight from the U.S that will be the final high cost investment in this project. Pictures will appear whenever they arrive.
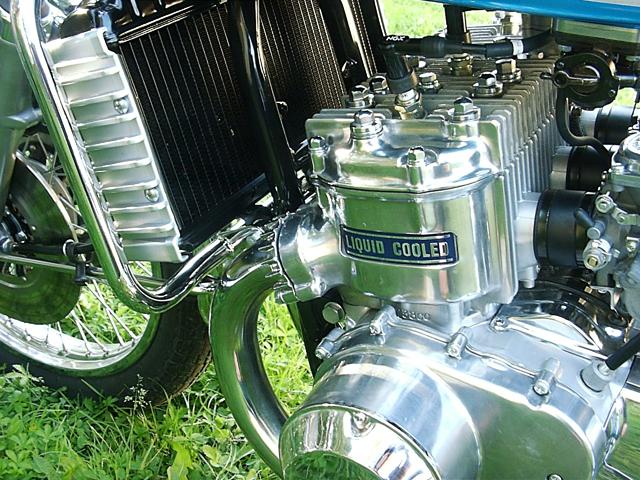
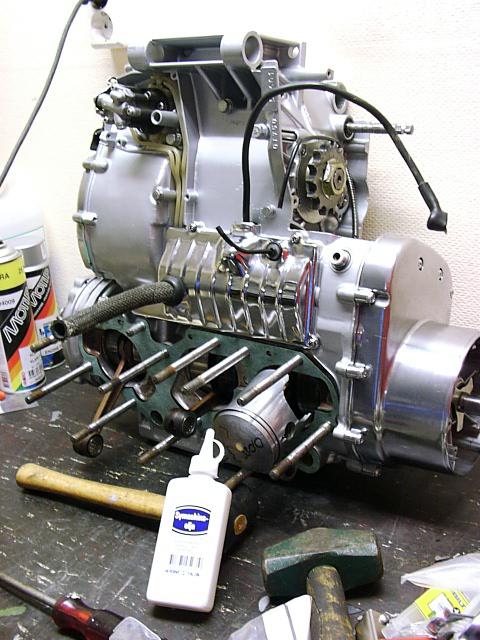
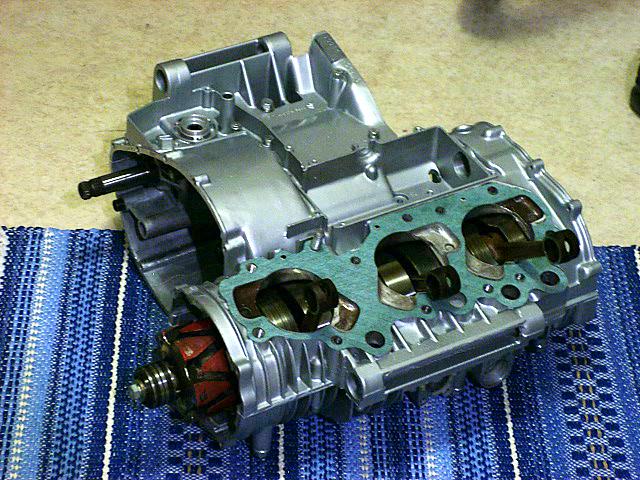
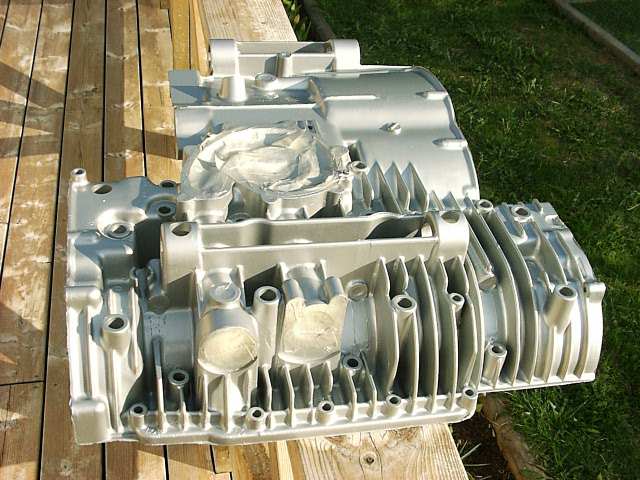
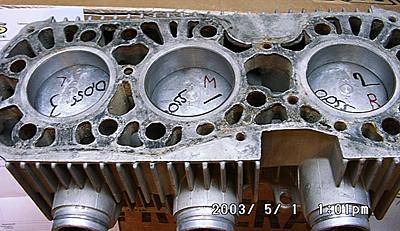
My initial ambition level has been to only refinish the exterior of the engine. But I examined the piston clearance and clearly the engine would benefit from a rebore. It was at 1st over dimension and it looked like the rebore had been done to a larger clearance, like for an air cooled triple. I already have a set of 1.0 (2nd oversize) pistons since some time ago so these come handy.
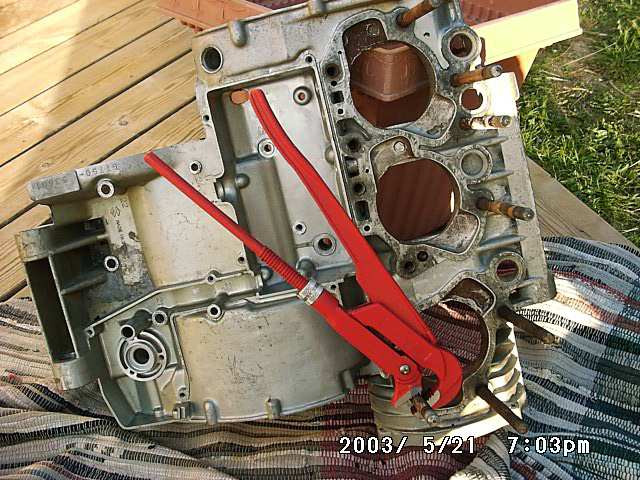
To begin with I wasn't sure if I was going to be able to remove the cylinder block and that would determine if I would do a more detailed engine work.
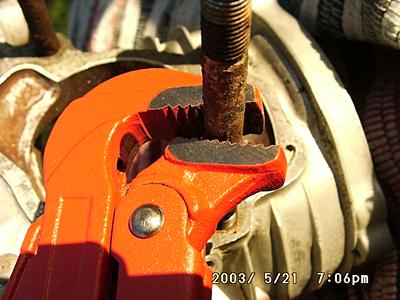
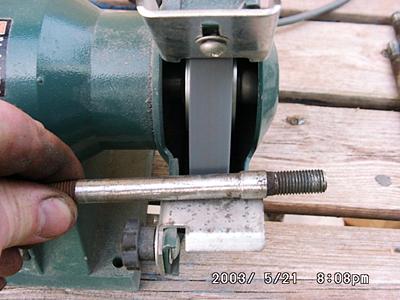
I used the same block extractor tools I made for the J restoration. I had the engine standing for several weeks with WD-40 in pin bolt holes. I applied the extractor bolts and used the head as a puller plate making sure not to apply any excessive force. No force was really needed, the block came off very easily and after it had moved about a centimeter I could turn the extractor bolts by hand to have the block move.
So this was a very straightforward engine.The puller is described in more detail on this page
It's not a good idea to use the head as a plate if any force is needed.. I placed a used head gasket betwen the puller nuts and the head surface to avoid any scratches. it's important to turn the bolts an equal amount at a time so that a uniform pulling force is obtained.
The block moves !
Most parts have been restored or replaced.
I've begun reassembling the bike and this is an enjoyable part of the restoration when doing this type of cosmethic restoration.
I got a set of like new flasher units and assembled a combination of new and original components that resulted in the best finish. The flashers of the U.S model sit on stalks that extend the width between flashers beyond what was the case for some other countries. It gives a 'flashy' look but reduces the space to move about in the garage..
This unique photo shows how I am extracting the stalks of the front flashers for use on a unit with better chrome quality but which had the shorter stalks. I used an oil pump gear (!) part of a setup that creates an extractor...when the bottom nut is turned this causes the stalk to be pulled out of the flasher housing....
Front flasher units and instruments in place:
Horn
Reiner Schneider in Germany supplied this beautiful Nikko horn.
18 Euros + postage to Sweden. Very close to the original !
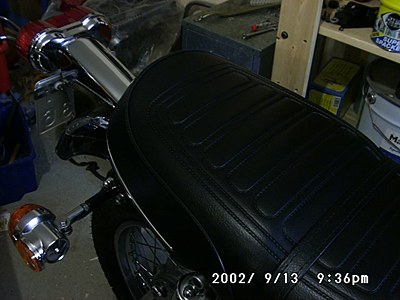
Seat
I got an all-new seat built by Eldorado Motorcycle Seat Restoration in Australia (Tony O'Connor).
Tony built the seat using all new reproduction material (seat cover, foam, chrome trim, etc.) on an original NOS Suzuki seat pane that I found on Ebay. The result is show condition appearance. The Eldorado seats are actually superior in build quality to a NOS original. Tony has a very good feel for original appearance.
After some persuasion I was able to get Tony to custom make a seat cover with the early style GT logo.
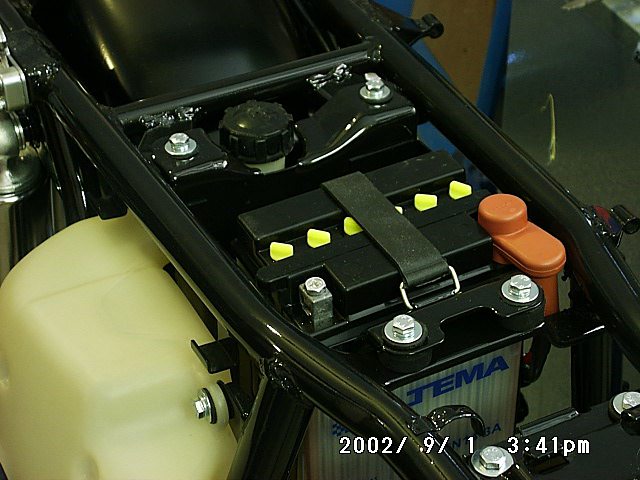
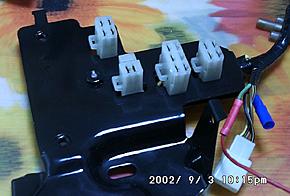
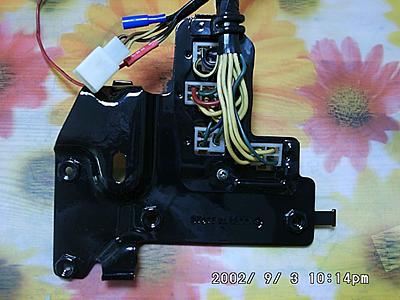
Actually the first delivered L model bikes came with this logo at the rear.Electrical system
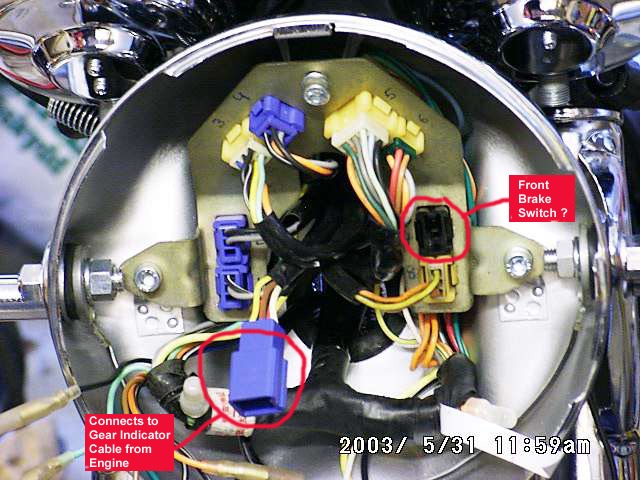
This shows the lower wiring harness with the restored connection plate. I have some work left to do in this area..
Regards,
/gunnar (You can find my email address here)